Sign-in to your Ancestry account.
Click on the DNA tab at the top of the page:
![]()
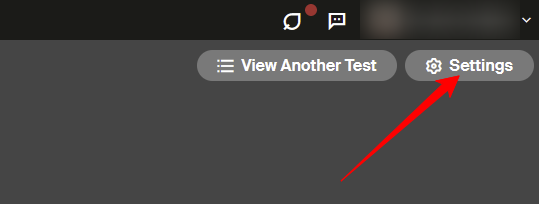
If you already have your AncestryDNA results, click on the Settings button near the top right of the page (if you have access to multiple DNA accounts, you may need to use the View Another Test button to select the correct kit before clicking Settings):
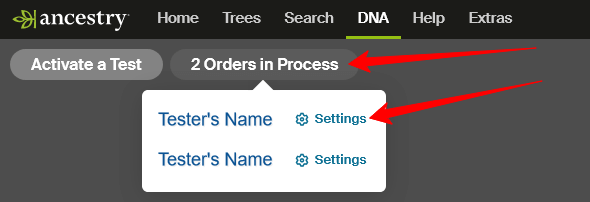
If you have activated your AncestryDNA test kit but your results are not ready yet, the Settings button is on the Orders in process button near the top left of the page. Click on Settings next to the tester’s name:
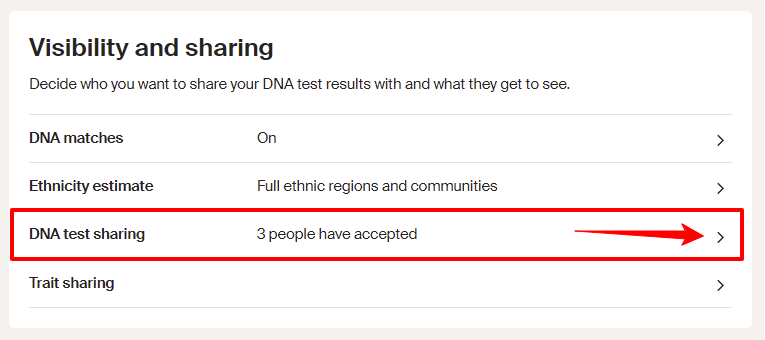
On the DNA Settings page, scroll down to the Visibility and sharing section and click on DNA test sharing:
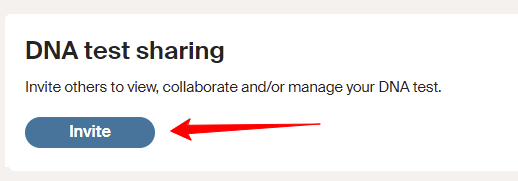
On the DNA test sharing page, click on the blue Invite button.
Type or copy in my Ancestry username (GeneticGenealogist) or my email address, select the Viewer or Collaborator option and then click on Invite:
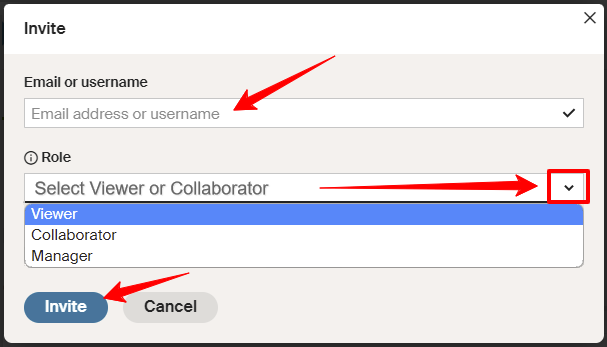
(Tip: If I only need to view your DNA results please just select Viewer access. If I am helping you with an unknown parentage case, genealogy mystery, or coaching you how to work with your DNA results, then I will need Collaborator access in order to group your matches, review your DNA account settings, link your DNA to your family tree, add notes to matches, link matches to your tree, view your ThruLines, or show you how to do all these things. Click on 🛈 Role to review role functions).
Done! Once you have clicked Invite, Ancestry will email me an invitation to view your results, and once I accept it, they will email you to let you know.
Note: You control your sharing, so you can change or revoke sharing access at any time.
Sign-in to your Family Tree DNA account.
Once you have signed in, click here to open my private FTDNA project page or click on the project header image below:
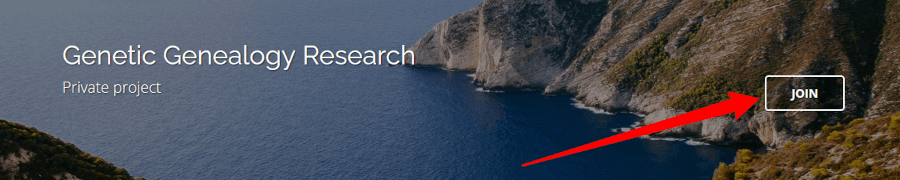
Click on the JOIN button in the header and follow the instructions to confirm.
(Tip: The default admin access level (Limited) is usually all I need, unless you’d like me to help you with your myFamilyTree and the Family Matching feature (eg. to link Family Finder DNA matches to your tree to populate your Paternal/Maternal/Both tabs), or if you’d like me to review any FTDNA Project results (such as Y-DNA surname projects), in which case I would need Advanced admin access to view, use, or show you how to use those features).
Joining my project will enable me to view your Family Tree DNA results without you needing to share your login details.
Note: You control your sharing, so you can change the admin access level or leave the project at any time.
Sign-in to your Living DNA account.
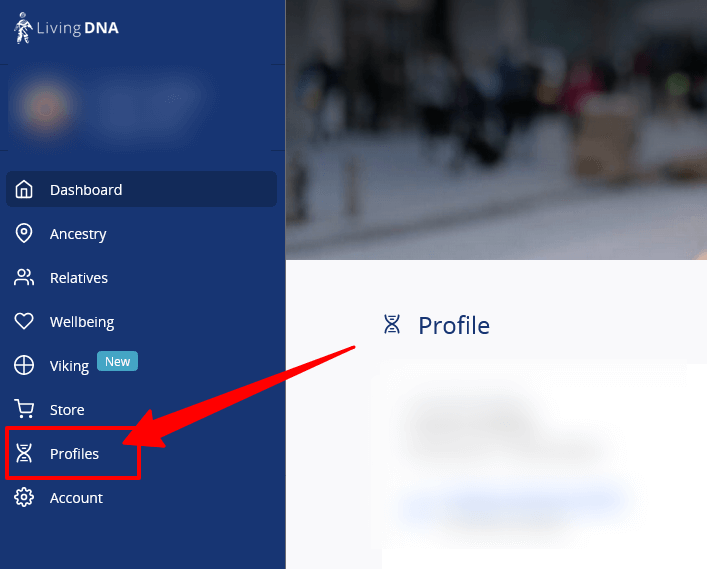
From the Dashboard page, click on Profiles on the left menu:
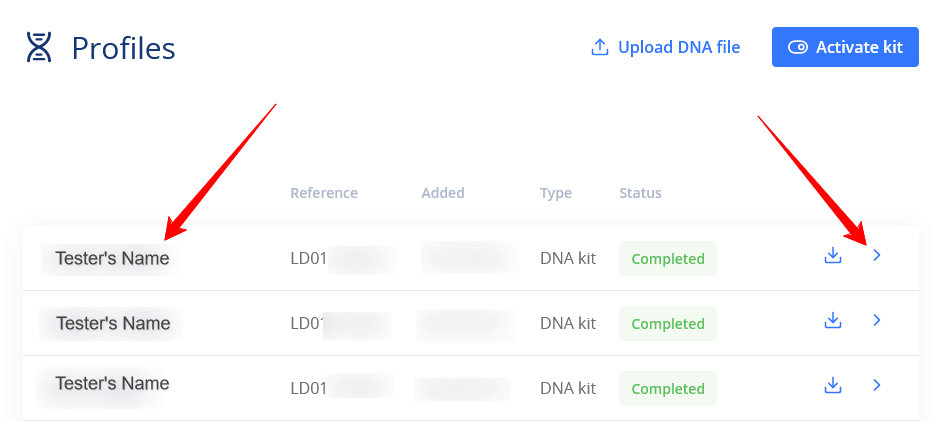
Select your profile by clicking on your name or on the little arrow to the right:
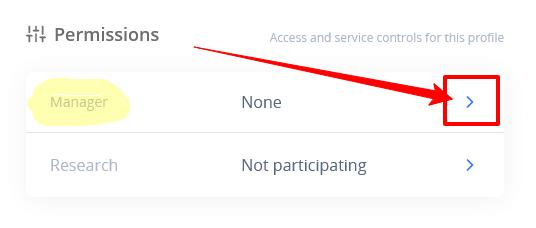
On your Profile page, scroll down to Permissions and click on the little arrow to the right of Manager, as below:
You can now add the email address of a manager, helper, family or friend – but only one at a time, and it must be a valid email address belonging to a current Living DNA user’s account.
Read the information under the heading (there is more than I have shown here), then carefully type my email address into the box as below, and click Save:

This will enable me to view your Living DNA matches from within my Living DNA account, without you having to share your login details.
Note: You control your sharing, so you can remove my email address at any time, which will remove my access to your DNA results.
MyHeritage does not yet offer the ability to easily share DNA results with professional researchers, family and/or friends.
(Note: If you upload DNA data for someone else – eg. a relative, you can invite them to view their own results (from the Manage DNA Kits page), but the invitation is single-use only, intended just for that DNA tester).
MyHeritage DNA results can be reviewed via screen sharing (eg. Zoom, GoTo, Teams), and the match lists, segment data and AutoCluster reports are easy to share, as follows:
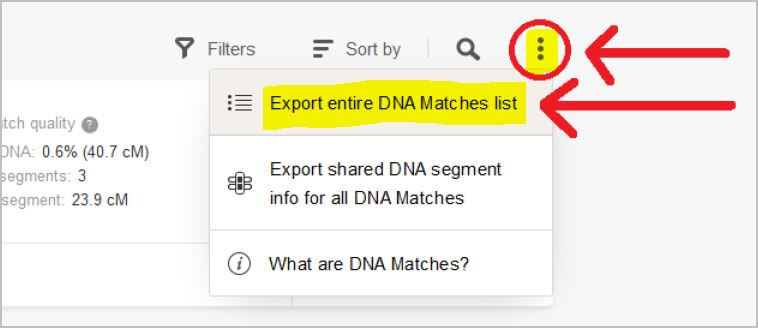
Export DNA matches list
Download a list of your DNA matches by clicking on the menu icon (three dots) at the top right of your DNA match list, and then selecting Export entire DNA Matches list:
The zipped file will be sent to the email address linked to your MyHeritage account. Once the email arrives, forward it to my email address.
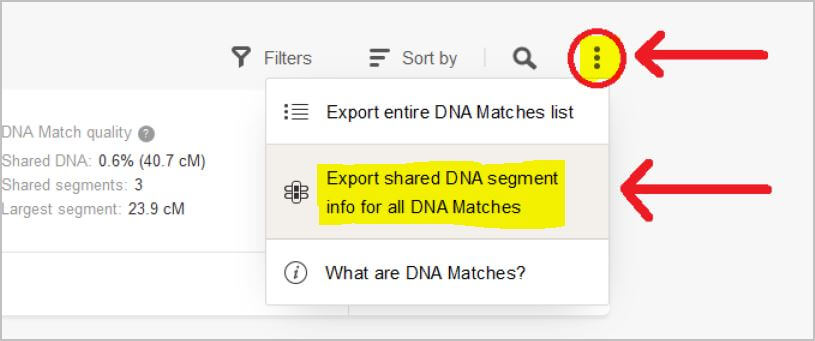
Export shared DNA segments
Download a list of the DNA segment information you share with your matches by clicking on the menu icon (three dots) at the top right of your DNA match list, and then selecting Export shared DNA segment info for all DNA Matches:
The zipped file will be sent to the email address linked to your MyHeritage account. Once the email arrives, forward it to my email address.
AutoCluster Tool
One of the most useful tools is the AutoCluster tool, as it groups (some, but not all of) your DNA matches into genetic clusters, it details how much DNA each match shares with you, and it includes links to the matches’ family trees on MyHeritage.
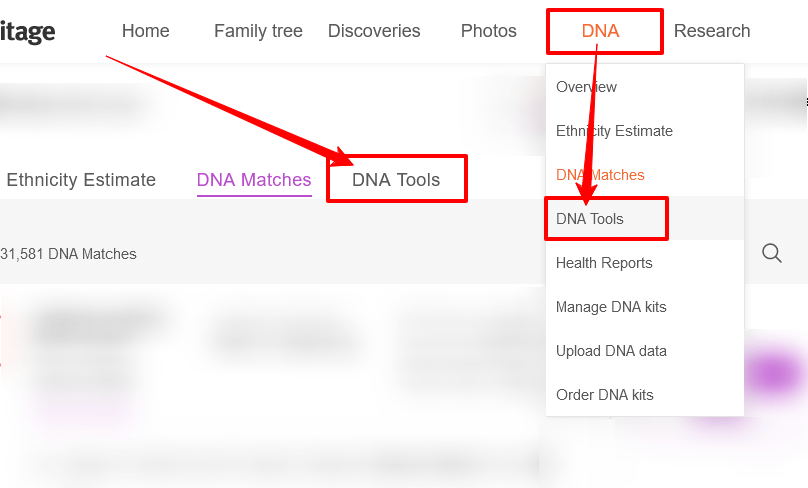
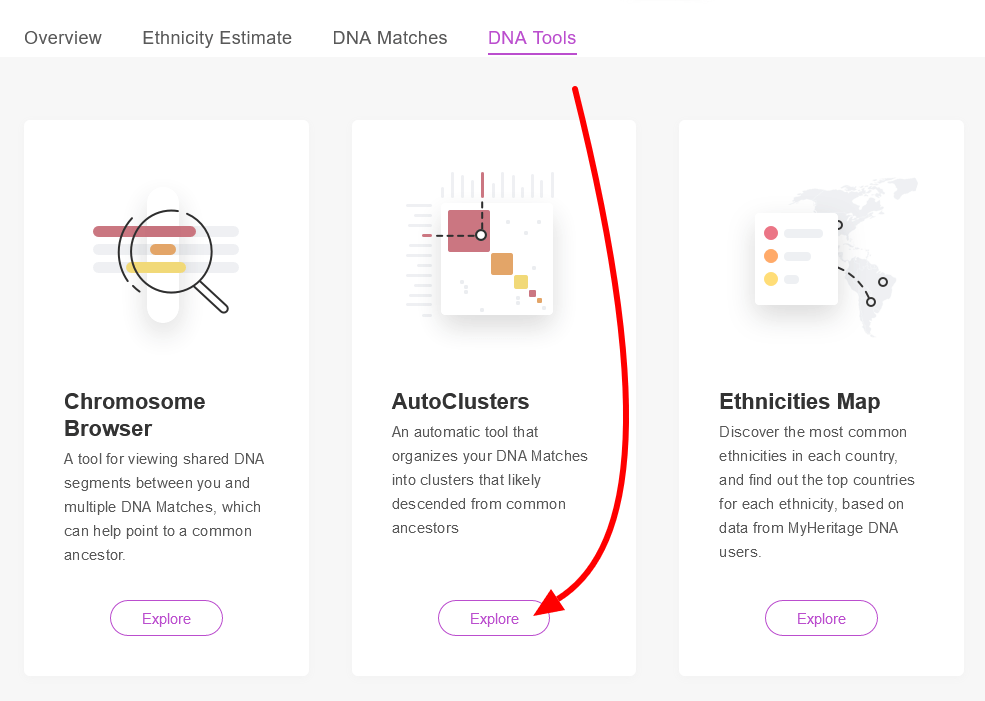
To generate an AutoCluster report you need to go to the Tools menu, either by hovering on the DNA tab at the top of the page and clicking on DNA Tools, or by clicking the Tools tab near the top of your DNA matches list:
On the Tools page, click on the Explore button under AutoClusters, as shown below:
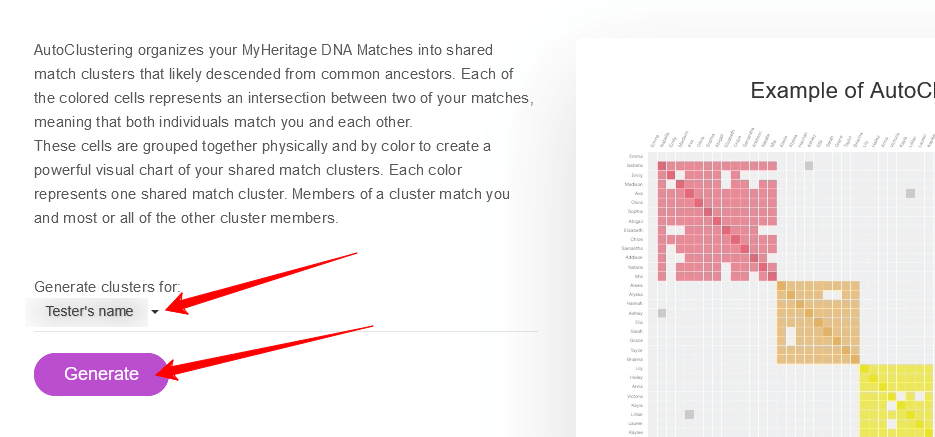
Ensure your name is selected under Generate clusters for (if you manage more than one DNA kit in your account), and then click on the Generate button:
The zipped AutoCluster reports will be sent to the email address linked to your MyHeritage account. Once the email arrives, forward it to my email address.
Note: If you transferred your DNA data into MyHeritage DNA for free and you don’t have a MyHeritage subscription, you may not have access to the AutoCluster tool unless you were either grandfathered in during a promotion or unless you unlock your kit, which costs US$29.
[If you manage MyHeritage DNA results for someone else in your account (eg. a close relative), they can also view their DNA results in their own MyHeritage account if you either have a ‘person card’ for them in your family tree and you assign their DNA kit to them in your tree; or go to DNA > Manage DNA Kits > and you should see a link under their kit name to ‘Invite XXX to view their results’, although this invitation link is single-use and only available for the tester].
23andMe does not currently offer the ability to share DNA results with another person or helper. You can request to share with a friend or relative for comparing shared segments, but you can’t view their results or DNA matches. On 23andMe you can view shared DNA information only with those DNA matches who have opted for open sharing or have accepted your invitation to share.
Screen sharing
I can view your 23andMe DNA results during our online consultation. While we are screen sharing, I will watch and explain as I guide you through navigating your own results.
The other option is to share login credentials, in which case you may opt to set a temporary password.
To share your GEDmatch results with me, all you need to do is to provide me with your GEDmatch kit number. You may have already submitted it to me on your client background information form. Ensure that your GEDmatch kit is set to either Public or Research, as if it is set to Private, I won’t be able to see it. Instructions to check your GEDmatch kit.
If you don’t know what GEDmatch is, my blog post Tips for Using GEDmatch explains what it is, how to upload your DNA data, and how to use the most popular features and tools.
If you already have a family tree (or even just a part of a family tree) that is relevant to your DNA research or DNA consultation topic, please let me know what you have.
If you have an Ancestry family tree online, you can share that with me from your Tree Settings > Invitations page, by inviting my username (GeneticGenealogist) or my email address, selecting Editor, and ensure you tick Can view living people.
If you have a family tree elsewhere online, such as at MyHeritage, WikiTree, FamilySearch, Geni, Family Tree DNA, or GEDmatch, let me know what and where, and share the URL if applicable.
If you have a family tree but it is offline (on your computer, a PDF file, or even just on paper), let me know and we’ll arrange what is needed.
If you don’t have a family tree at all (perhaps because you don’t yet know your family), don’t worry… we will address that and start a free tree for you if required.
If you already have a family tree on Ancestry that includes the part of your ancestry that you do know (eg. your maternal side), or if you already have a speculative tree containing your unknown DNA matches, below are instructions to share the tree with me.
Sign-in to your Ancestry account.
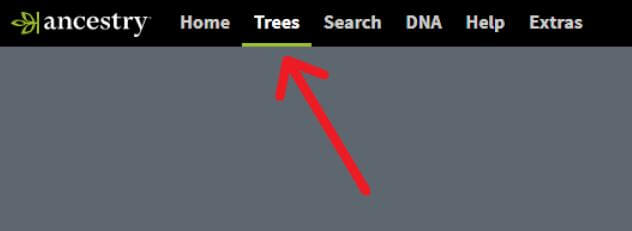
Click on the Trees tab at the top of the page:
Select the tree from the list (if you have more than one tree) to view the tree.
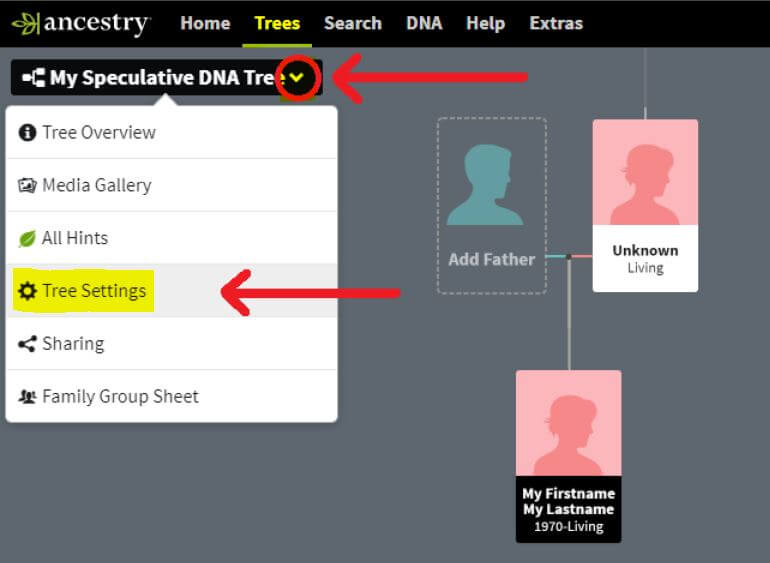
Then click on the tree name or arrow to open the drop-down tree menu and click on Tree Settings:
On the Tree Settings page, click on the Invitations tab, then click on the Invite People button:
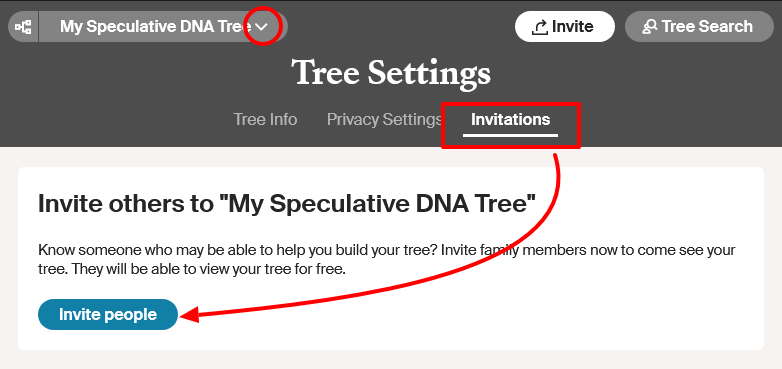
To invite me to help you with your tree, click on the Username: tab in the pop-up (below).
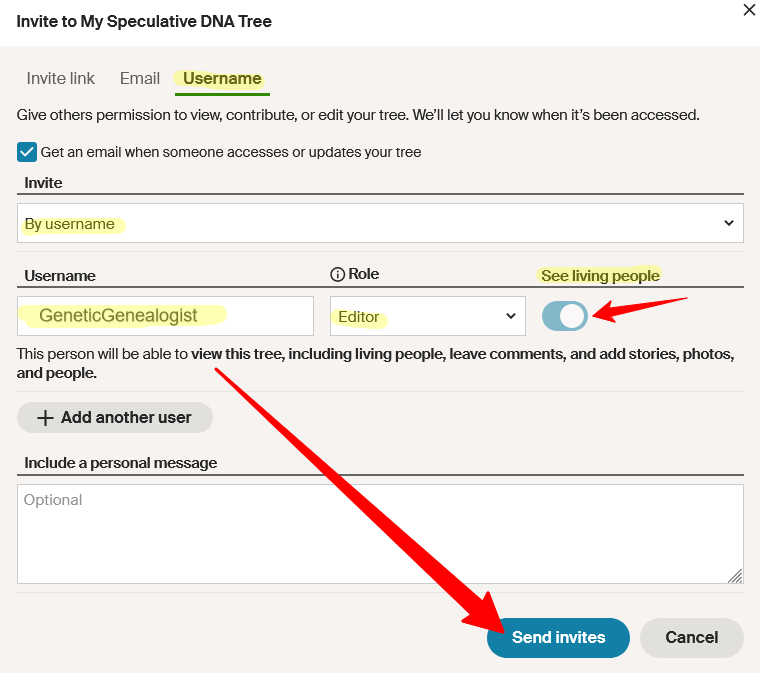
Enter my username (GeneticGenealogist) by typing or copying it into the Username box, then click the little arrow on the Role drop-down and select Editor (so I can add people to your tree), ensure the See living people switch is on, then click on the orange Send Invites button.
You can uncheck the option to receive emails when your tree is updated, unless you particularly want them. You can also share by email address or an invitation link if you prefer.
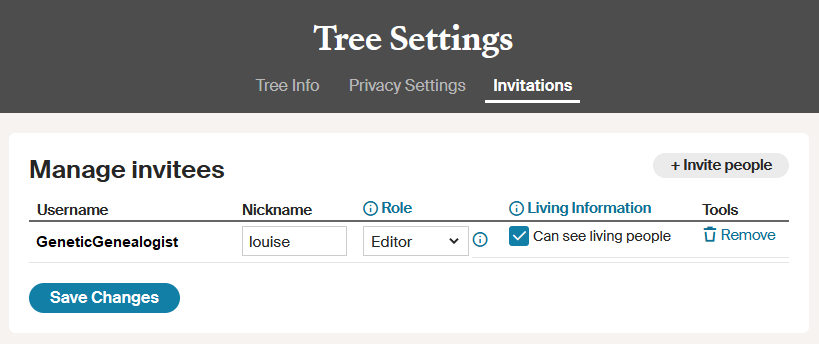
You’ll then be back at Manage Invitees (on the Sharing tab) where you can edit, re-send and revoke any tree sharing. Double-check that the Can see living people checkbox is ticked for me, then click on Save Changes:
Done! Ancestry will now send me an email invitation to your new tree. Once I accept the invitation, Ancestry should email you to notify you that I have accepted your tree sharing invitation.
You can edit or revoke sharing access at any time.
If you don’t already have a private & unsearchable family tree on Ancestry (where unlimited online trees are free), specifically to assist with your DNA research to identify biological family, below are instructions to create one and share it with me so I can show you how to use it.
Sign-in to your Ancestry account.
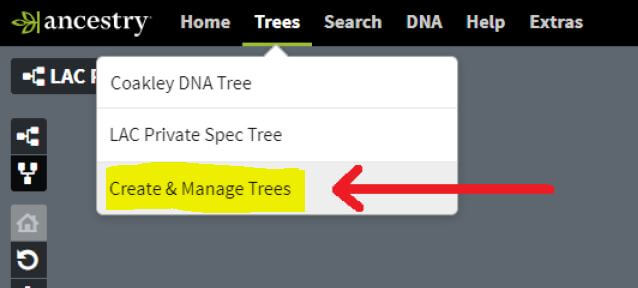
Click on the Trees tab at the top of the page:
Click on Create & Manage Trees at the bottom of the tree menu:
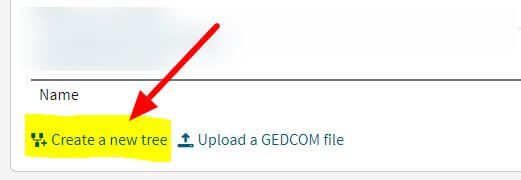
Scroll down the page and click on Create a New Tree at the bottom of your list of trees (if you already have any):
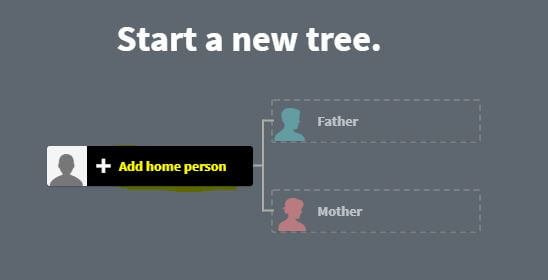
You will be prompted to add the first person (the home person) to your tree.
This is normally you, so click on + Add home person:
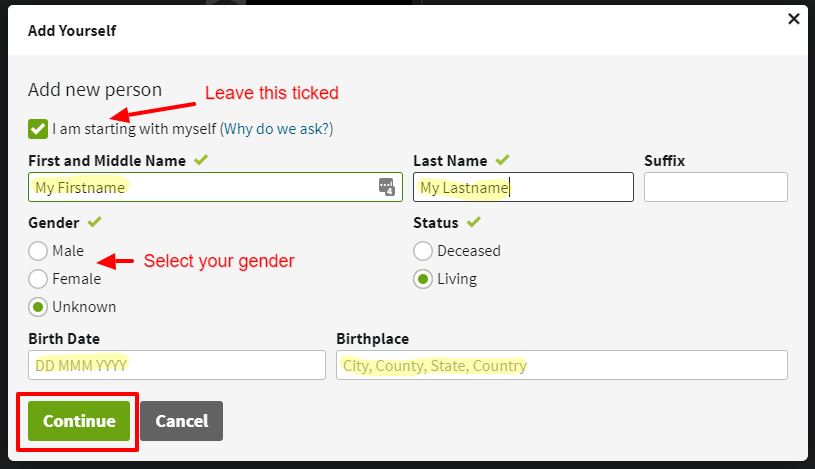
Enter your name, select your gender/sex, add your birth date (if you are searching for a parent; otherwise birth year will do), and birth place, and then click Continue:
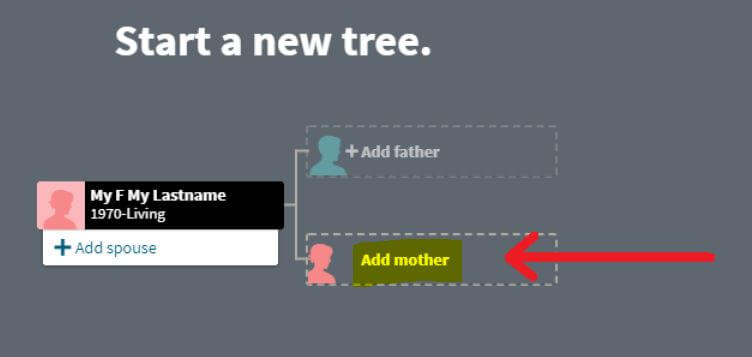
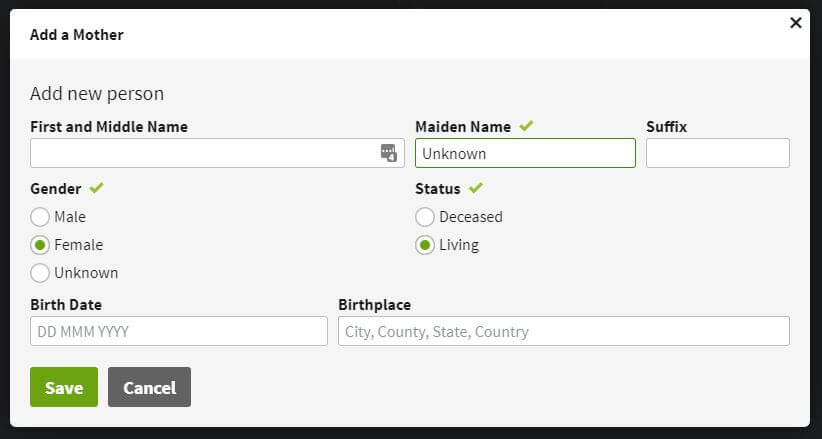
You will then need to enter at least one parent’s name to finish creating the tree. If you don’t know either parent’s name you can just type in Unknown for the name, as we can edit it later. Click on Add mother (or Add father):
Enter known details of the parent, or type in Unknown, then click Save:
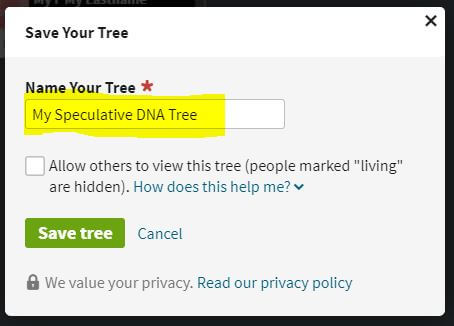
You now need to name your new tree. Something descriptive is usually best, such as YourName Private & Unsearchable DNA Tree or YourName DNA Research Tree… then click Save tree:
Now your new tree is almost ready to build! You can always find your tree easily by clicking on the Trees tab in the top menu.
Note that when you are viewing your tree, you’ll see the tree name in the top left corner of the screen, and it has a little arrow to the right of the name.
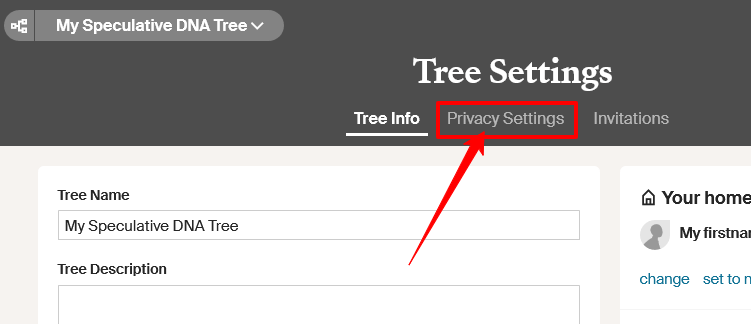
Click the tree name or arrow to open the drop-down tree menu, and click on Tree Settings:
Note the three tabs under the Tree Settings heading. Click on Privacy Settings:
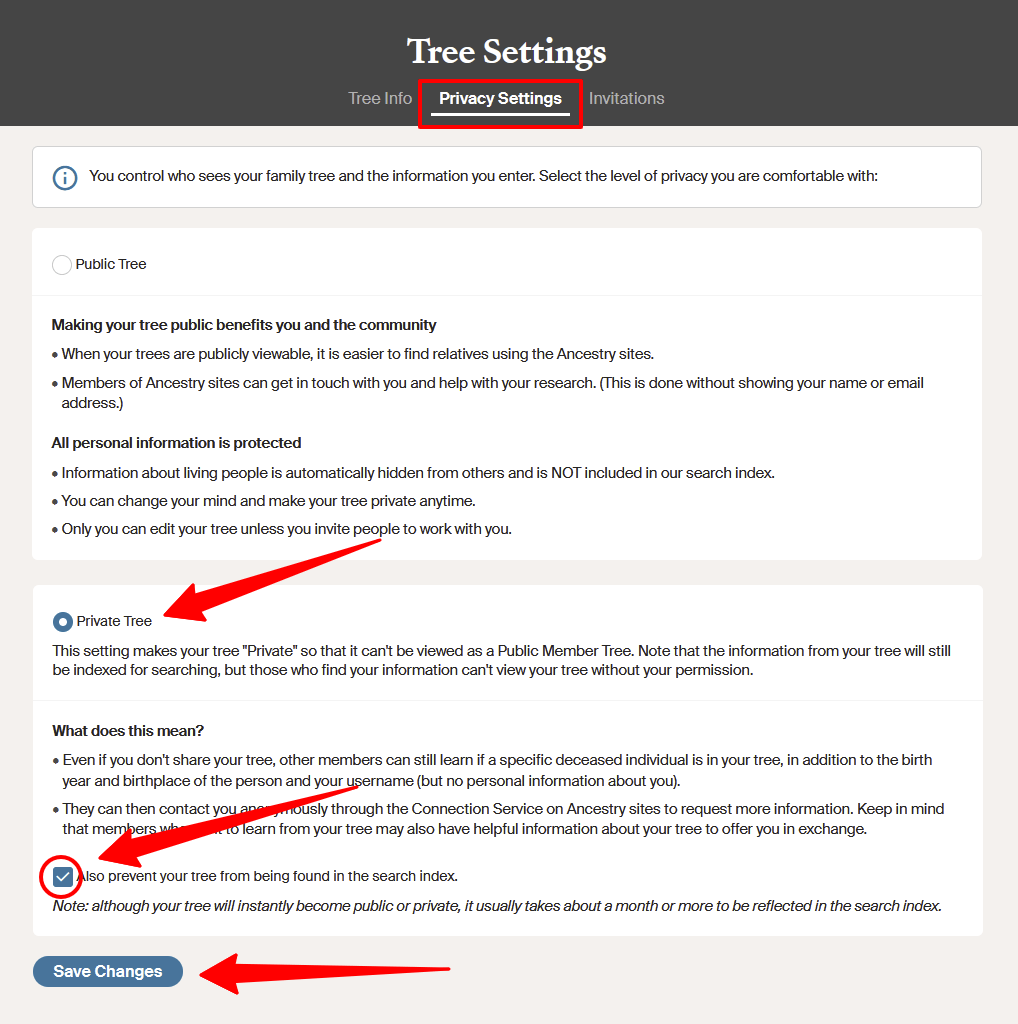
On the Privacy Settings page, select Private Tree, and ensure you tick the checkbox to Also prevent your tree from being found in the search index (aka Unsearchable)… and then click Save Changes:
You have now successfully created your own Private & Unsearchable family tree! Remember that you can always find it very easily by clicking on the Trees tab on Ancestry’s top menu.
Next, back on the Tree Settings page, click on the Invitations tab and follow the instructions (further back up this page) to share your new tree with me.